if you ever got into a problem where, element’s style is not looking or behaving like you intended.
this is a very common problem and below can be the solution.
"Conflicts between CSS rules addressing the same element may arise. Most of them can be solved by considering the rules of cascading order and inheritance."
- HTML documents are loaded and read sequentially from top to bottom, so it is important where a style attribute is declared.
- CSS rules written further below in a file will be read and interpreted later than the ones at the top.
- This applies for one CSS file as well as for the whole HTML document incorporating many styles.
Que: what happens when we have two different rules for same element?
Ans: the last rule being read will get applied to the element.
Que: but what happens when we add inline CSS? while having rule with same property for same element in external CSS.
Ans: in case of external CSS and inline CSS, rules in the CSS file will get ignored. and inline CSS will get applied. The reason is that the reference to CSS file being in head, firstly external CSS is loaded in the background. Subsequently, the inline CSS is loaded and interpreted together with the HTML file and therefore overwrites the previous rules.
note: if there are two different rules for different properties for same element then both rules are applied, even if they are in different external files and even if one is inline while other is external.
Que: what happens when external and internal CSS come together?
Ans: this is easy. It depends on the order in which they are declared. when first an external style is referenced and then the internal style will be applied. the last rules being interpreted will result in final style .
💡 tip: When using all three variants of CSS (e.g. on big websites) you usually reference the external styles first, then apply an internal CSS to the HTML file (e.g. a subsite), and then sometimes use inline CSS for quick tests.
For this scenario the cascading order would be: “cascading means flowing down”
- The browsers default is applied first (= the user settings).
- Then the external styles are loaded.
- Then the internal style is added.
- And finally the inline style is applied.
Besides the cascading order, there is another main reason why an HTML element’s style might not look or behave like you intended.
In case of nested elements inside HTML, There are two kinds of style “properties”:
- those that are, always inherited (they have values inherited from parent element).
- and those that are, not inherited by default, and have initial (default values).
example:

note: Here, the color property as well as the font-size property are inherited automatically, whereas the border property is not inherited.
💡 tip: In many cases you have to find out yourself what properties are inherited and which not. But as a rule of thumb, most text- and font-related properties are inherited and everything size- and positioning-related is not.
You can take a look at this slightly outdated list of properties and their inheritance status.
also, you can manually overwrite inherited properties or force inheritance.
Child element inherit style properties from Parent element.
<div style= “color: blue;”>
        <p style= “color: inherit; ”> HELLO! </p>
</div> Child element use its default value for the property. “remember they are set by browser”
<div style= “color: blue;”>
        <p style= “color: initial; ”> HELLO! </p>
</div>The unset CSS keyword resets a property to its inherited value if the property naturally inherits from its parent, and to its initial value if not.
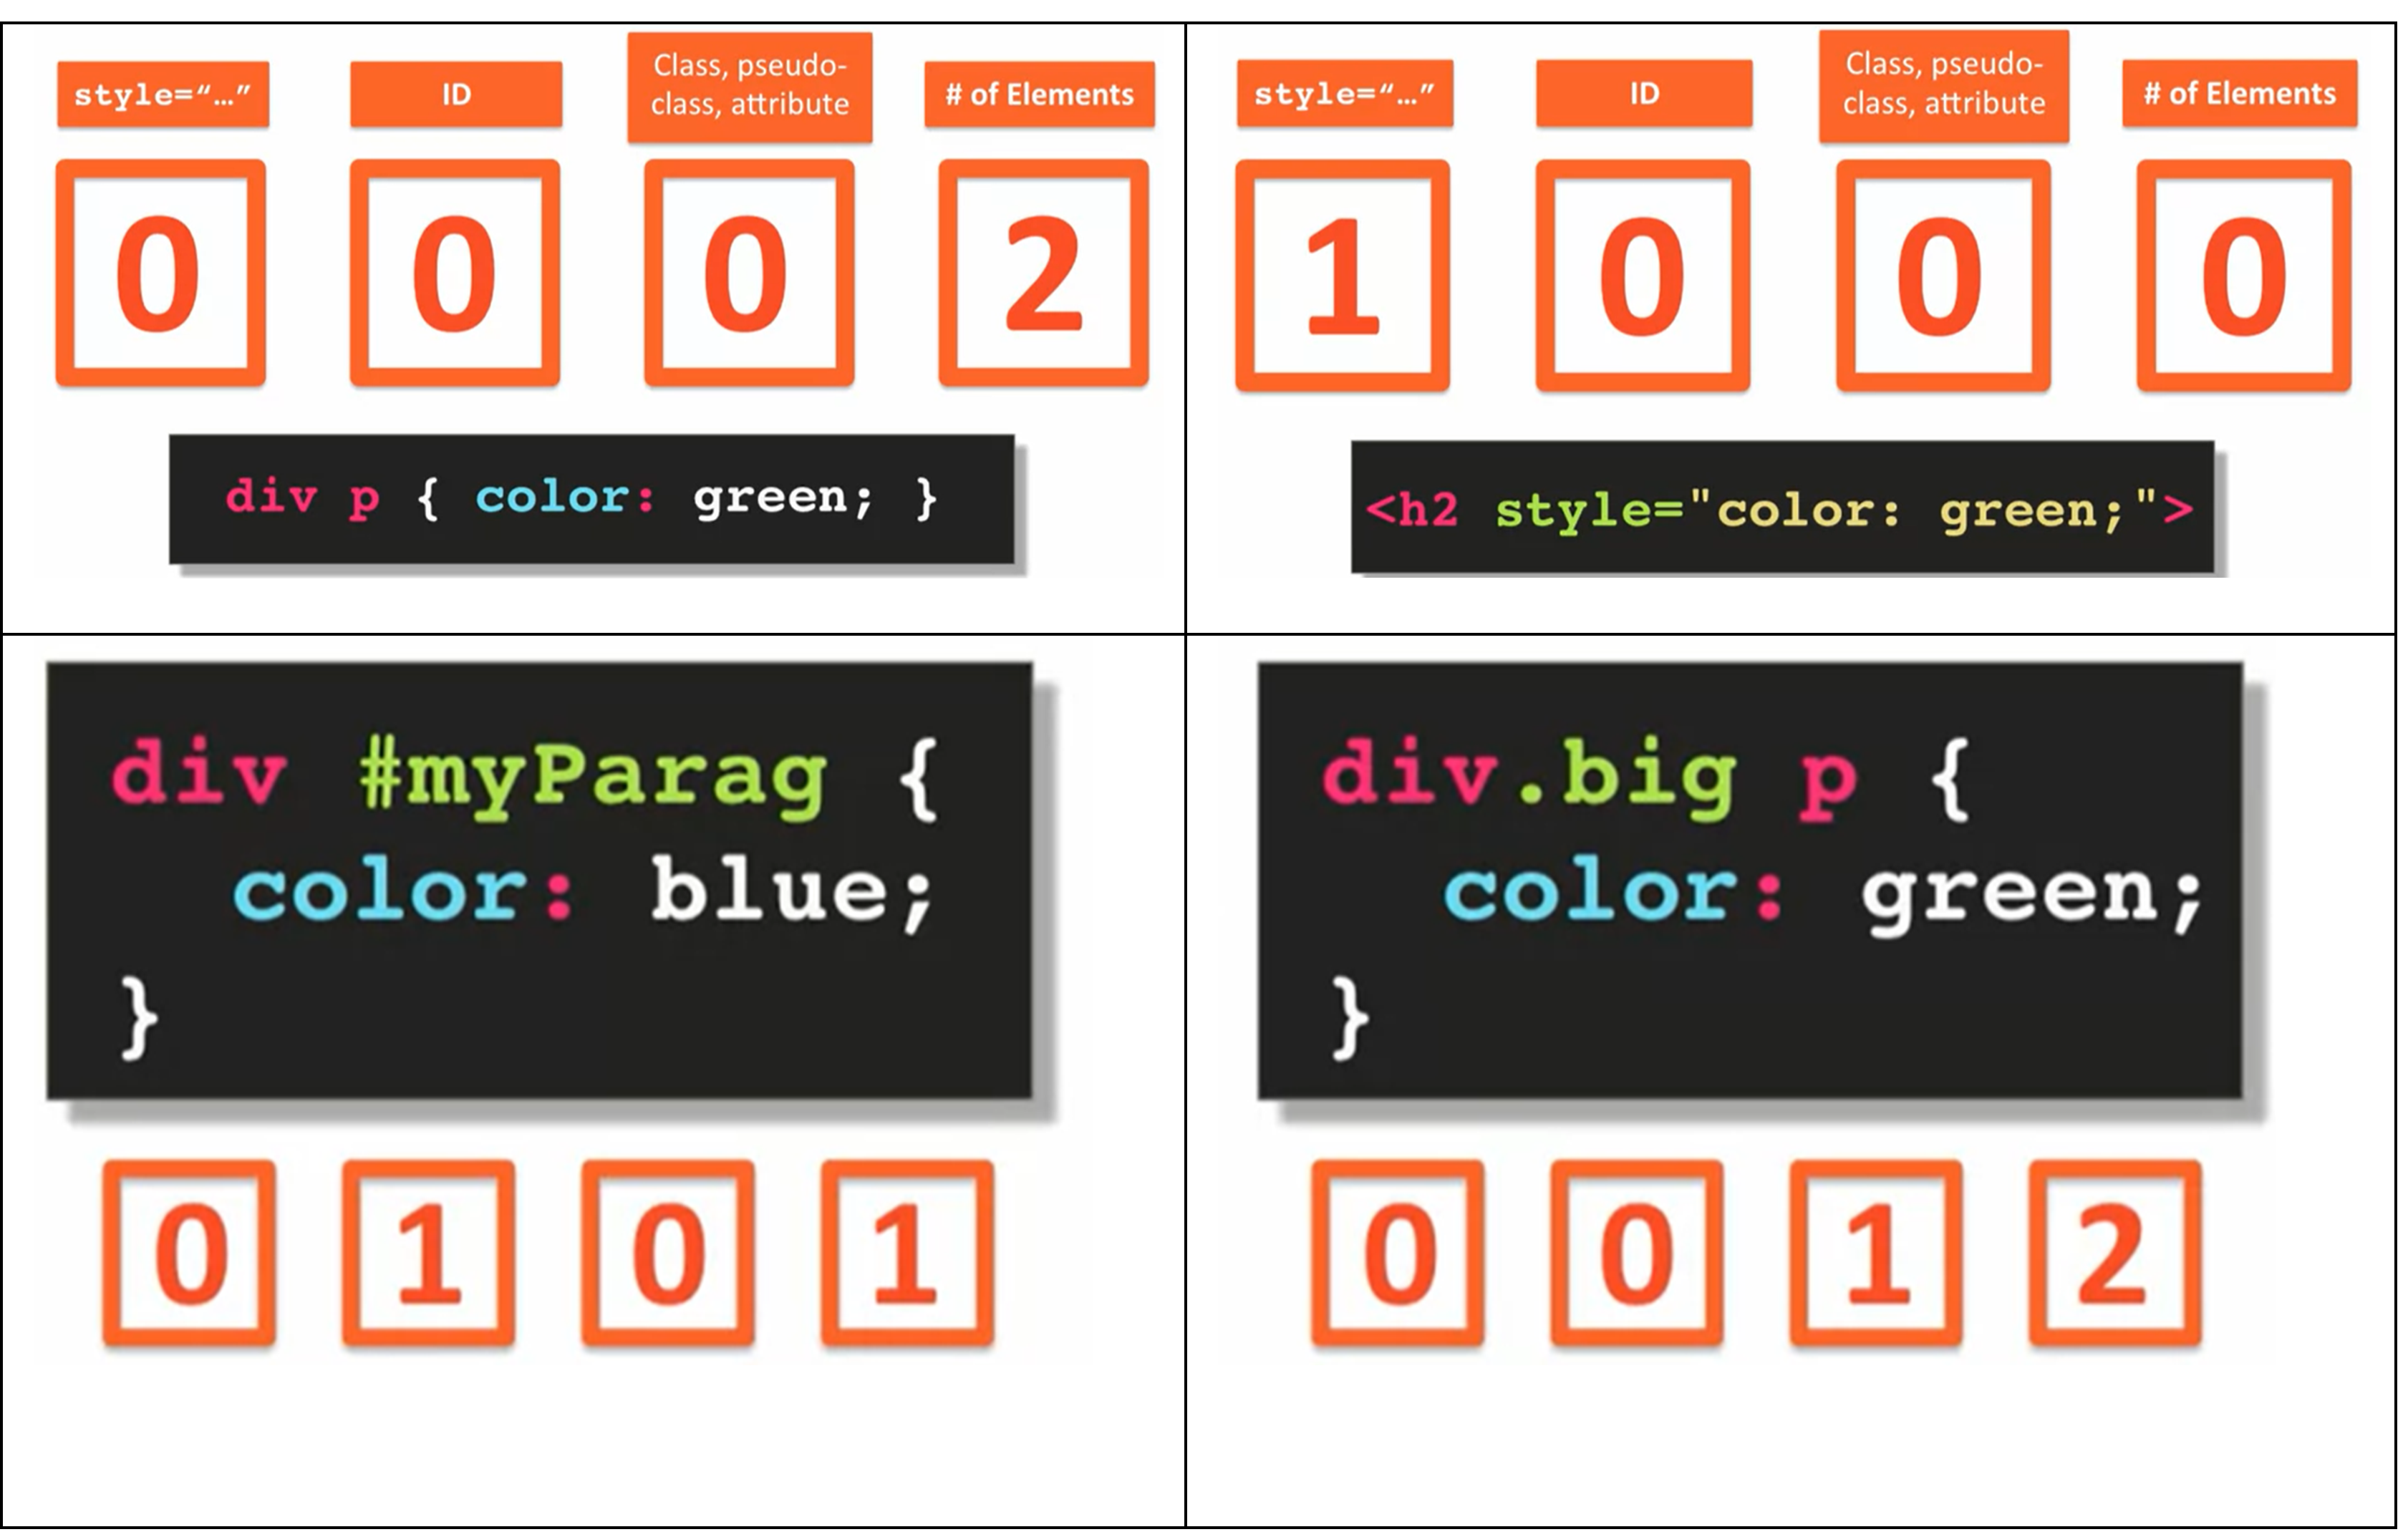
If there are two or more conflicting CSS rules that point to the same element, the browser follows some rules to determine which one is most specific and therefore wins out.
Think of specificity as a score/rank that determines which style declarations are ultimately applied to an element.
There are four categories which define the specificity level of a selector:
- Inline styles -
Example: <h1 style="color: #ffffff;">. - IDs - An ID is a unique identifier for the page elements, such as #navbar.
- Classes, attributes and pseudo-classes - This category includes .classes, [attributes] and pseudo-classes such as :hover, :focus etc.
- Elements and pseudo-elements - This category includes element names and pseudo-elements, such as h1, div, :before and :after.
note: The universal selector (*) has low specificity, while ID selectors are highly specific! , learn to calculate specificity here.
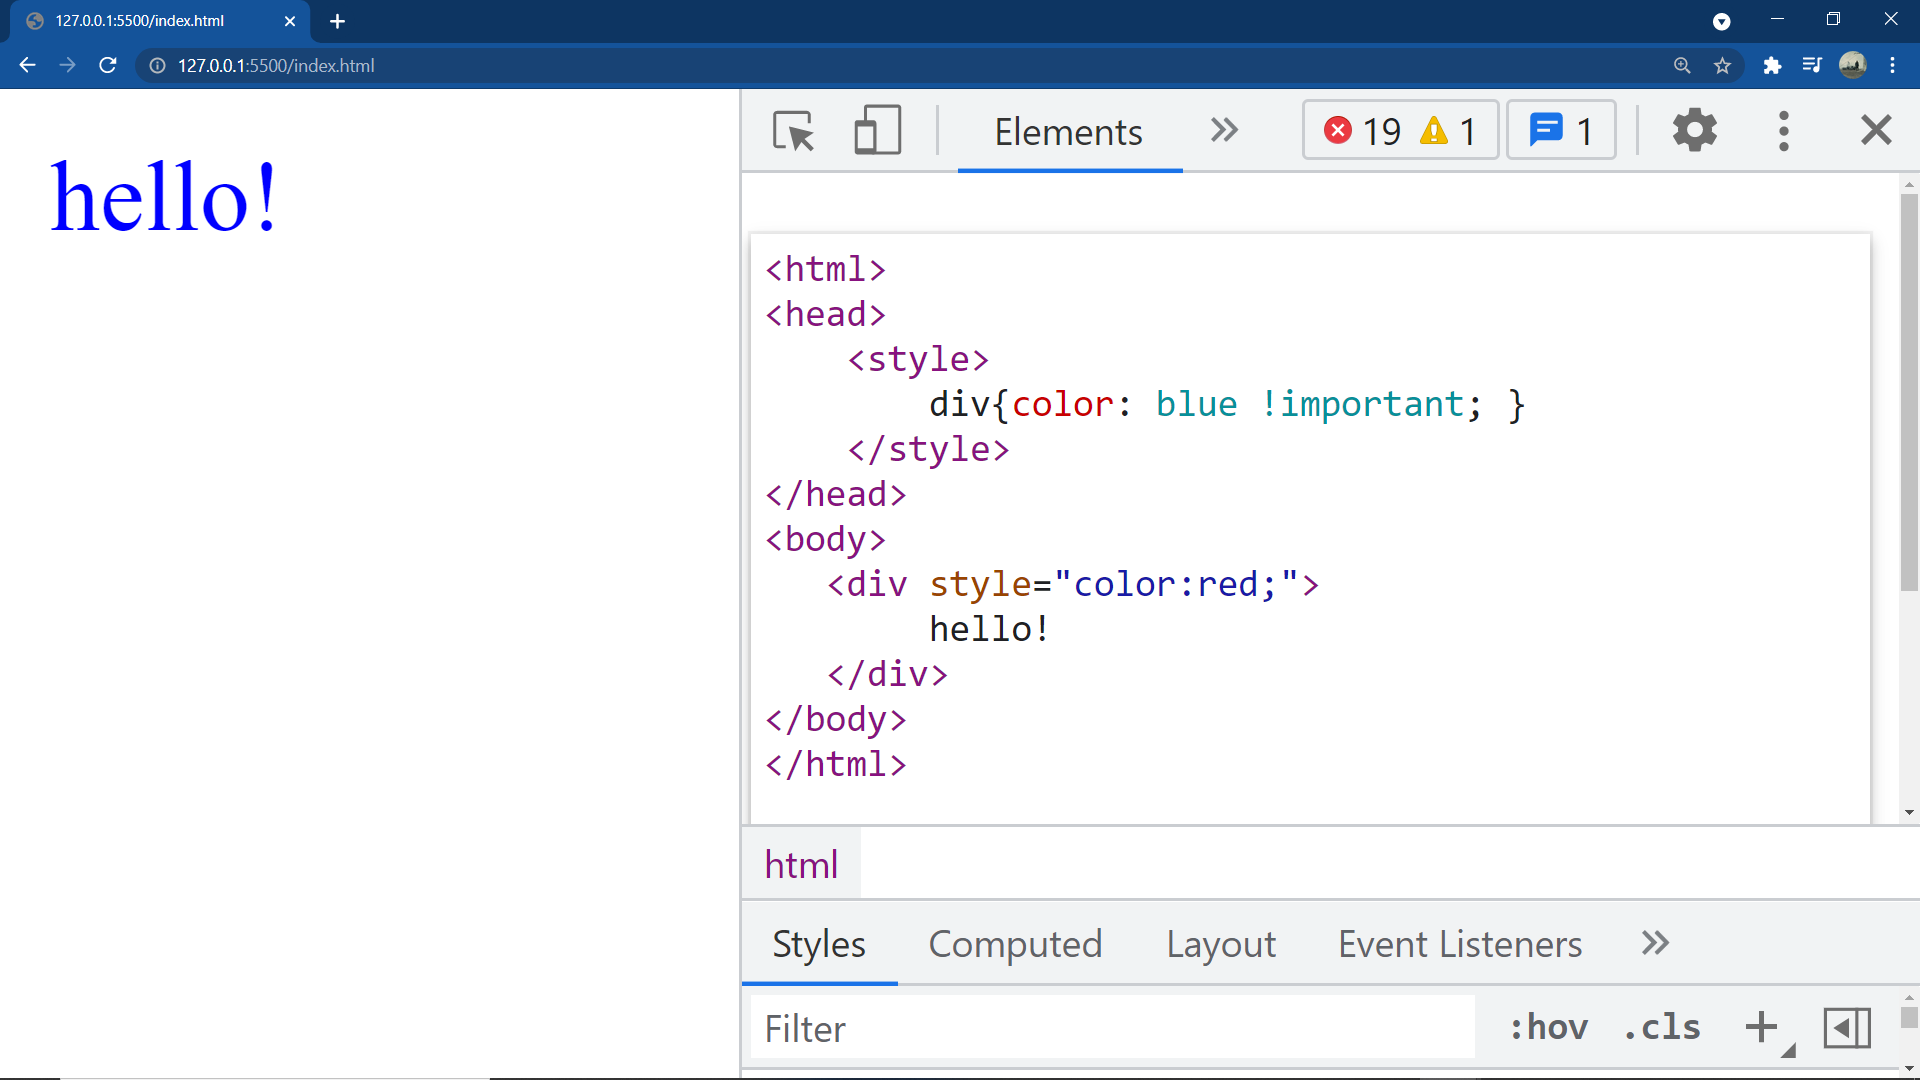
- “this keyword increases the specificity of a property to infinity”.
- technically it overrules every other CSS rule Present for the same property.
|
For addressing the children of an element you have to use a CSS rule like this:
parent-selector child-selector { property: value; ...} Note: the parent selector and child selector are separated by a simple whitespace.
This combination of parent-selector and child selector selects all elements that are descendant’s “childrens” of the specified element “parent element”. and hence also known as descendent selector.
|
Inside CSS |
Inside HTML Body |
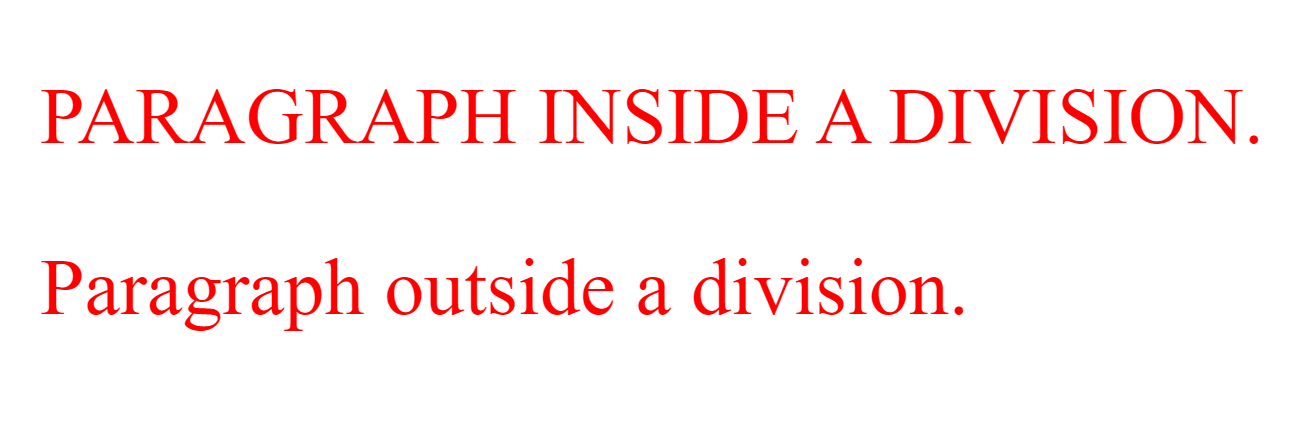
 div p {
   color: red;
 } /* more specific */

 p {
   text-transform: uppercase;
} |
 <div>
        <p>Paragraph inside a division.
        </p>
 </div>
 <p>Paragraph outside a division.
</p> |
|
Output:
|
|
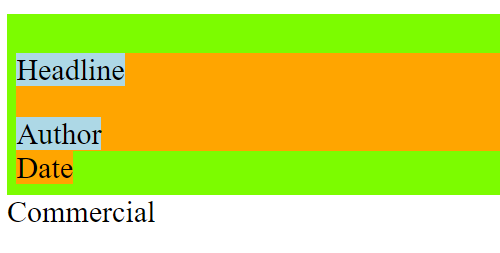
the asterisk (*). When used as child selector, It will address all elements inside the parent selector. This will also happen when the asterisk is followed by another child selector.
|
Inside CSS |
Inside HTML Body |
 section {
   background-color: lawngreen;
 }
 section * {
   background-color: orange ;
 }
 section * span {
   background-color: lightblue;
} |
 <section>
        <div>
     	 <p>
                       <span>Headline</span>
     	 </p>
     	 <span>Author</span>
       </div>
 <span>Date</span>
 </section>
<span>Commercial</span> |
|
Output:
|
|
💡 tip: Nesting of CSS selectors can help to set the style more precisely and dynamically. However, to apply this technique efficiently, it is crucial to have a well-structured HTML code. Sometimes, this can mean that you must add an element that is not absolutely necessary for the visual appearance, but is needed to select or position another related element. these elements are called non-semantic elements ex: <span>, <div>.
note: If it comes to nesting of classes you have to be careful with the blank space.
div .my-class has a space and selects all elements with the class “my-class” that are descendants of division element.
Whereas an ex: div.my-class has no space between element and class selector and therefore addresses all division elements having the class “my-class”.
note: these selectors with no space are also called “Elements with class selector”.
-----------------------
📝 important note: #id div{ } “doesn’t mean element with this id and div inside this id”, “it means div elements inside the element with this id” same as parent-selector child-selector { } “means these child elements inside this parent element”.
tip: now it must be easier to understand that #id.class{ } “without space” is more specific than #id .class{ } “with space” .
💡 Note 📝
div{...}selects all div elements.div {...}selects all elements that are descendents of div,div p{...}selects all<p>elements that are descendents of<div>elements .